Josh Mayhem’s Blown Away Dunny Design Process
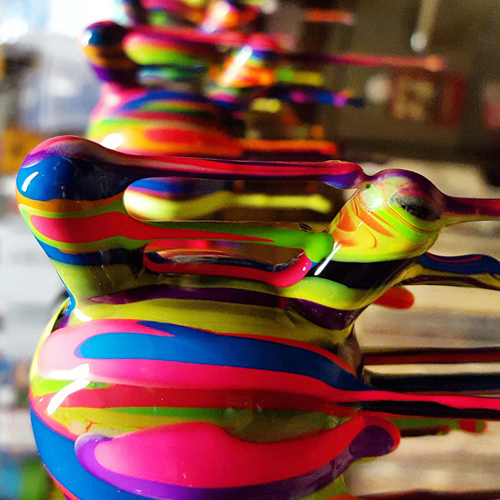
We are beyond thrilled to have a very special edition of Josh Mayhem’s Blown Away series just for our booth at Designer Con! Before the craziness and excitement for the convention arrives this weekend, Josh gave us a a behind the scenes look at the step by step process of making these amazing Dunnys.
The first step in the process is to create the correct pose for the Dunny. Once the pose is in place I glue the head and arms into position using Zap-A-Gap Glue (Medium) and Zip Kicker Accelerator. The glue dries quickly on its own, but the accelerator dries the bond instantly when sprayed onto the glue.
Next, using floral arrangement wire and crimpers, I will cut bars of 3 different lengths, about 4-5 bars each. The floral wire is malleable, easy to cut with crimpers, and will act as a support base and guide for the drips. I use a smaller radius wire for the 3” Dunnys, and a larger radius wire for the 8” Dunnys.
Using a Dremel 1100 Stylus I then drill about 15 holes in the same direction into the body, head, and arms of the figure. From there I insert the wire bars into the holes and glue them into place. Again I will spray the accelerator to speed up the bonding process. Once all of the bars have been attached I will carefully bend the bars into place so they are all pointing in the same direction.
On an 8” Dunny I then add Sculpey clay around each of the bars in order to create a thicker stalactite shape. This will also make them less susceptible to bending during shipping. For the 3” Dunnys I leave the bars as is without adding additional clay.

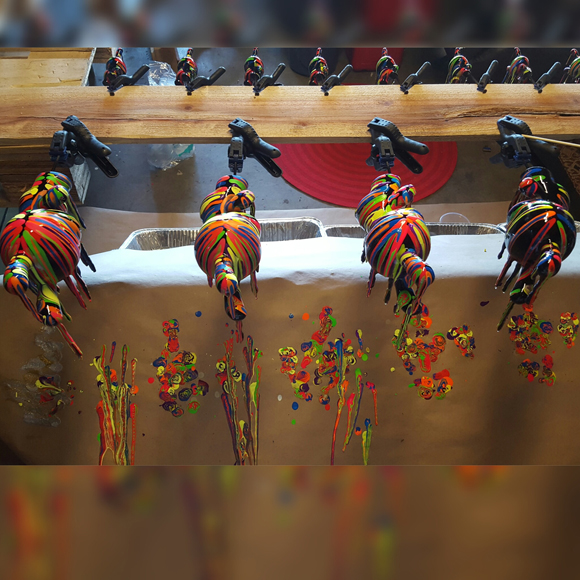
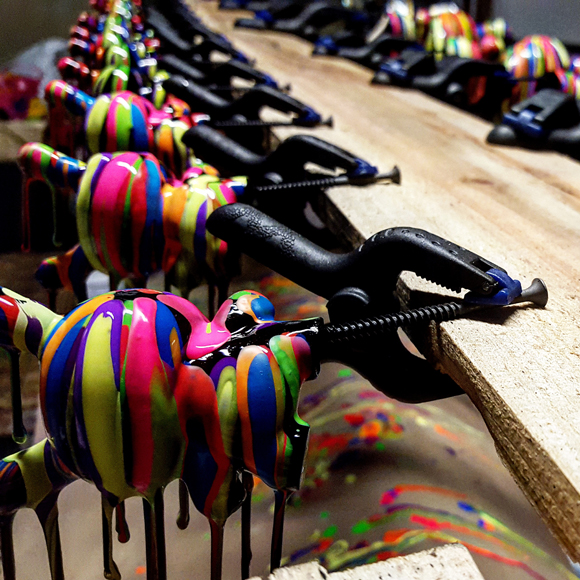
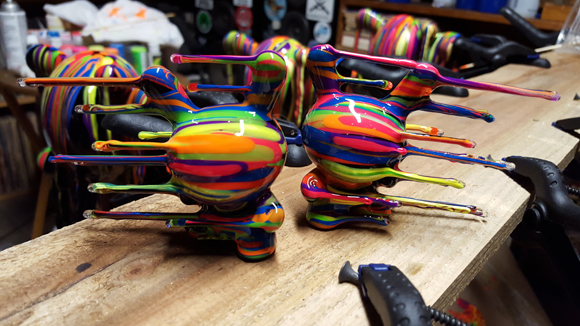
From there I will screw one 4” screw into the bottom of the Dunnys foot positioned at an angle allowing the bars to point straight down. I then place a clamp onto the screw, and then use another clamp to attach the clamp holding the Dunny to a board.
Using Krylon Gesso Spray I will apply one layer as a base primer. For many of my other style customs I use masking tape to create designs. The primer allows you to remove the masking tape without peeling away the paint. Then everything is painted black using Montana Gold spray paint.
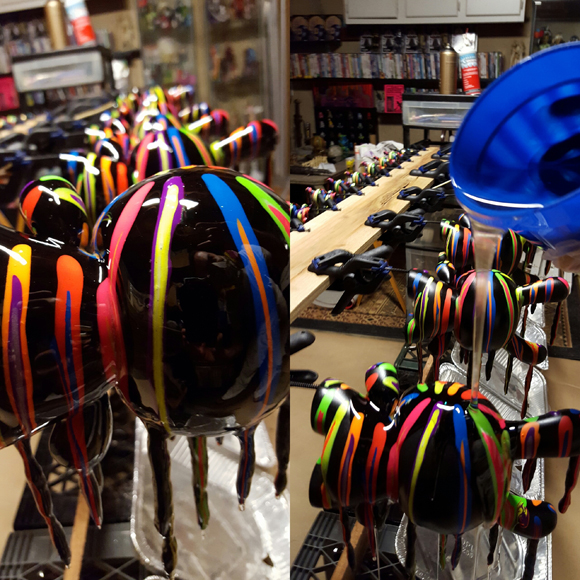
Now begins the process of applying the 1st layer of paint drips. I use UV reactive and glow in the dark liquid acrylic paint. Each paint drip is carefully placed, as are the 2nd color drips added to the center of the 1st drip. Often times I will guide the drip with either my breath or a guide stick to ensure that the drips connect to the pre-made stalactites.


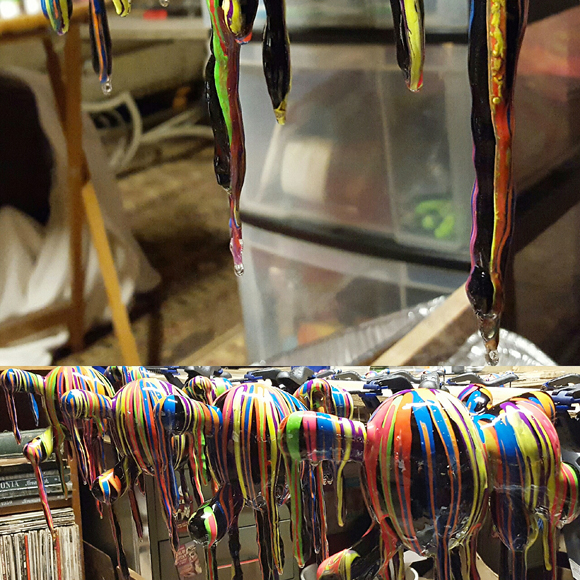
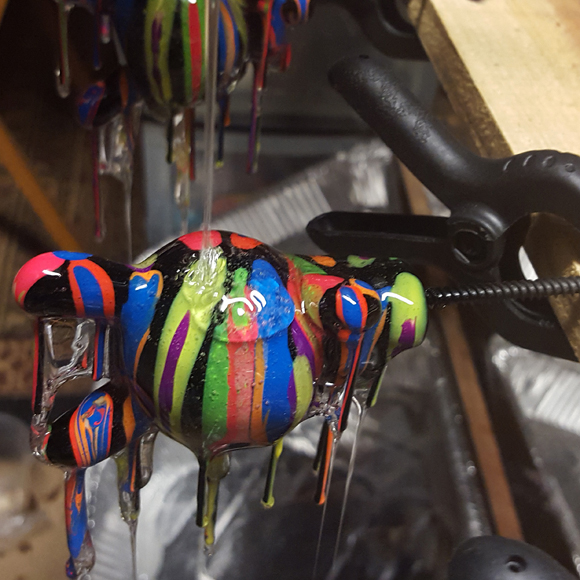
Once the paint has dried I will apply the first layer of resin. I use Pour On resin as it is available at most art stores, and the curing time is pretty quick. Under the figure I will rig a tray to funnel the resin run off that then drains into a cup. When the run off has been mostly collected I will reapply the resin, and place a 2nd cup under the drain to collect the new run off. I will repeat this process several times. Since the resin cures relatively fast each application is a bit thicker then the last.
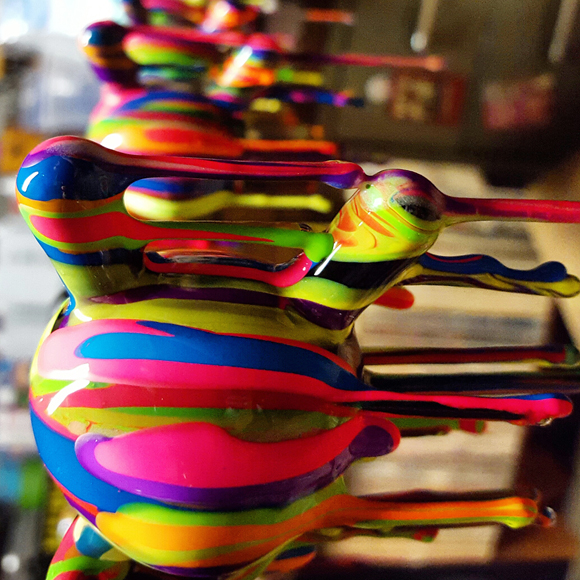
When the resin has dried (usually overnight) I will repeat the entire process of applying paint drips and resin layers two more times. This process creates a 3D effect that produces an aesthetic similar to blown glass, and each layer of paint and resin will add additional length to each of the stalactites as well.
So there you go. That’s how I make the magic happen. I would like to thank Kidrobot for giving me the opportunity to share my Blown Away customization process with all of you. If you can’t make it to the Kidrobot booth at DesignerCon 2015 to grab a Dunny from my new Blown Away Series 3 please feel free to contact me via www.joshmayhem.com as I am open for commissions.
Peace and Love!
There you have it! See you in Pasadena this weekend booth 518-521!
The post Josh Mayhem’s Blown Away Dunny Design Process appeared first on Kidrobot Blog.


Leave a comment